Create fully customisable surveys to better understand and benchmark your organization's travel and communicating behaviors. Select from different survey templates to suit your needs.
Contents
- Creating, cloning or editing a survey
- Completing the tabs within the survey wizard tabs
- The delivery tab
- The options tab
- The email
- The survey tab
- The thank you tab
- The recipients tab
- The review and publish modal
-
- Reviewing your survey results
- Survey analytics
- Individual responses
- Email performance
1. Creating, cloning, or editing a survey
- In your Mobilityways account, navigate to Surveys
- Create, clone, or edit a survey:
- To create a new survey, click Create survey in the upper right. On the next page, select the template you would like to use for your survey.
- To clone an existing survey, hover over the survey and click options, then from the dropdown menu select Clone survey.
- To edit an existing survey, hover over the survey and click options, then from the dropdown menu select Edit survey.

2. Completing the tabs within the survey wizard tabs
- Once you have created, cloned, or edited a survey you can begin to customize your survey.
-
- Click the edit pencil icon at the top to give your survey a unique name.
- Then work your way through the wizard tabs along the top of the screen in turn, the wizard tabs include
- Delivery
- Email / Options
- Survey
- Thank you
- Recipients
- Review and publish

a. The delivery tab
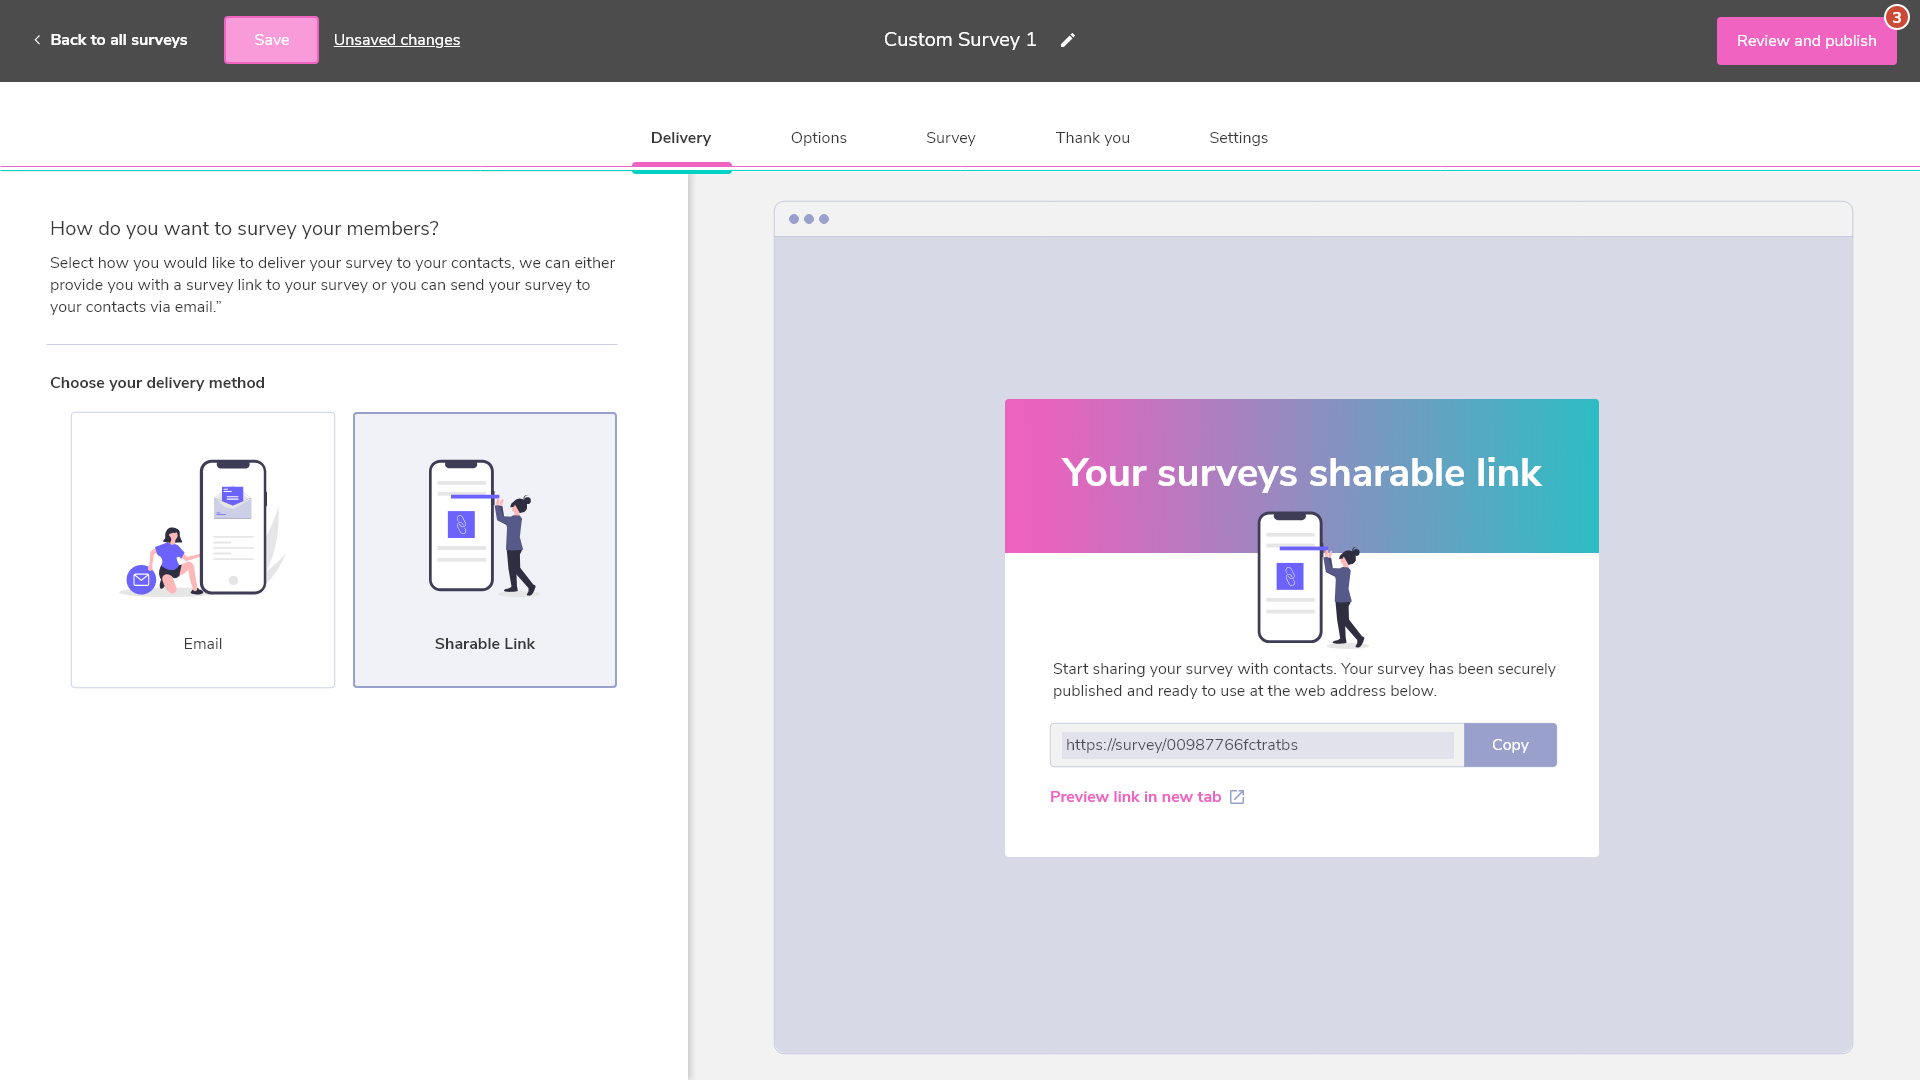
The delivery tab allows you to choose how you would like to deliver your survey to your contacts. You can do this by emailing your contacts directly through the Mobilityways survey tool this is the Email delivery method or generate a direct link to your survey which you can then send using your own method this is the Sharable link delivery method.
- Select the delivery method that suits your preferences by clicking Email or Sharable link.
- If you have selected Email, continue to the Email tab to begin customizing your survey email settings.
- If you have selected a sharable link, continue to the Options tab to customize your survey settings: you will be provided with your survey link once you publish your survey.
Note: Once you publish your survey you will not be able to change your survey delivery method.
b. The options tab
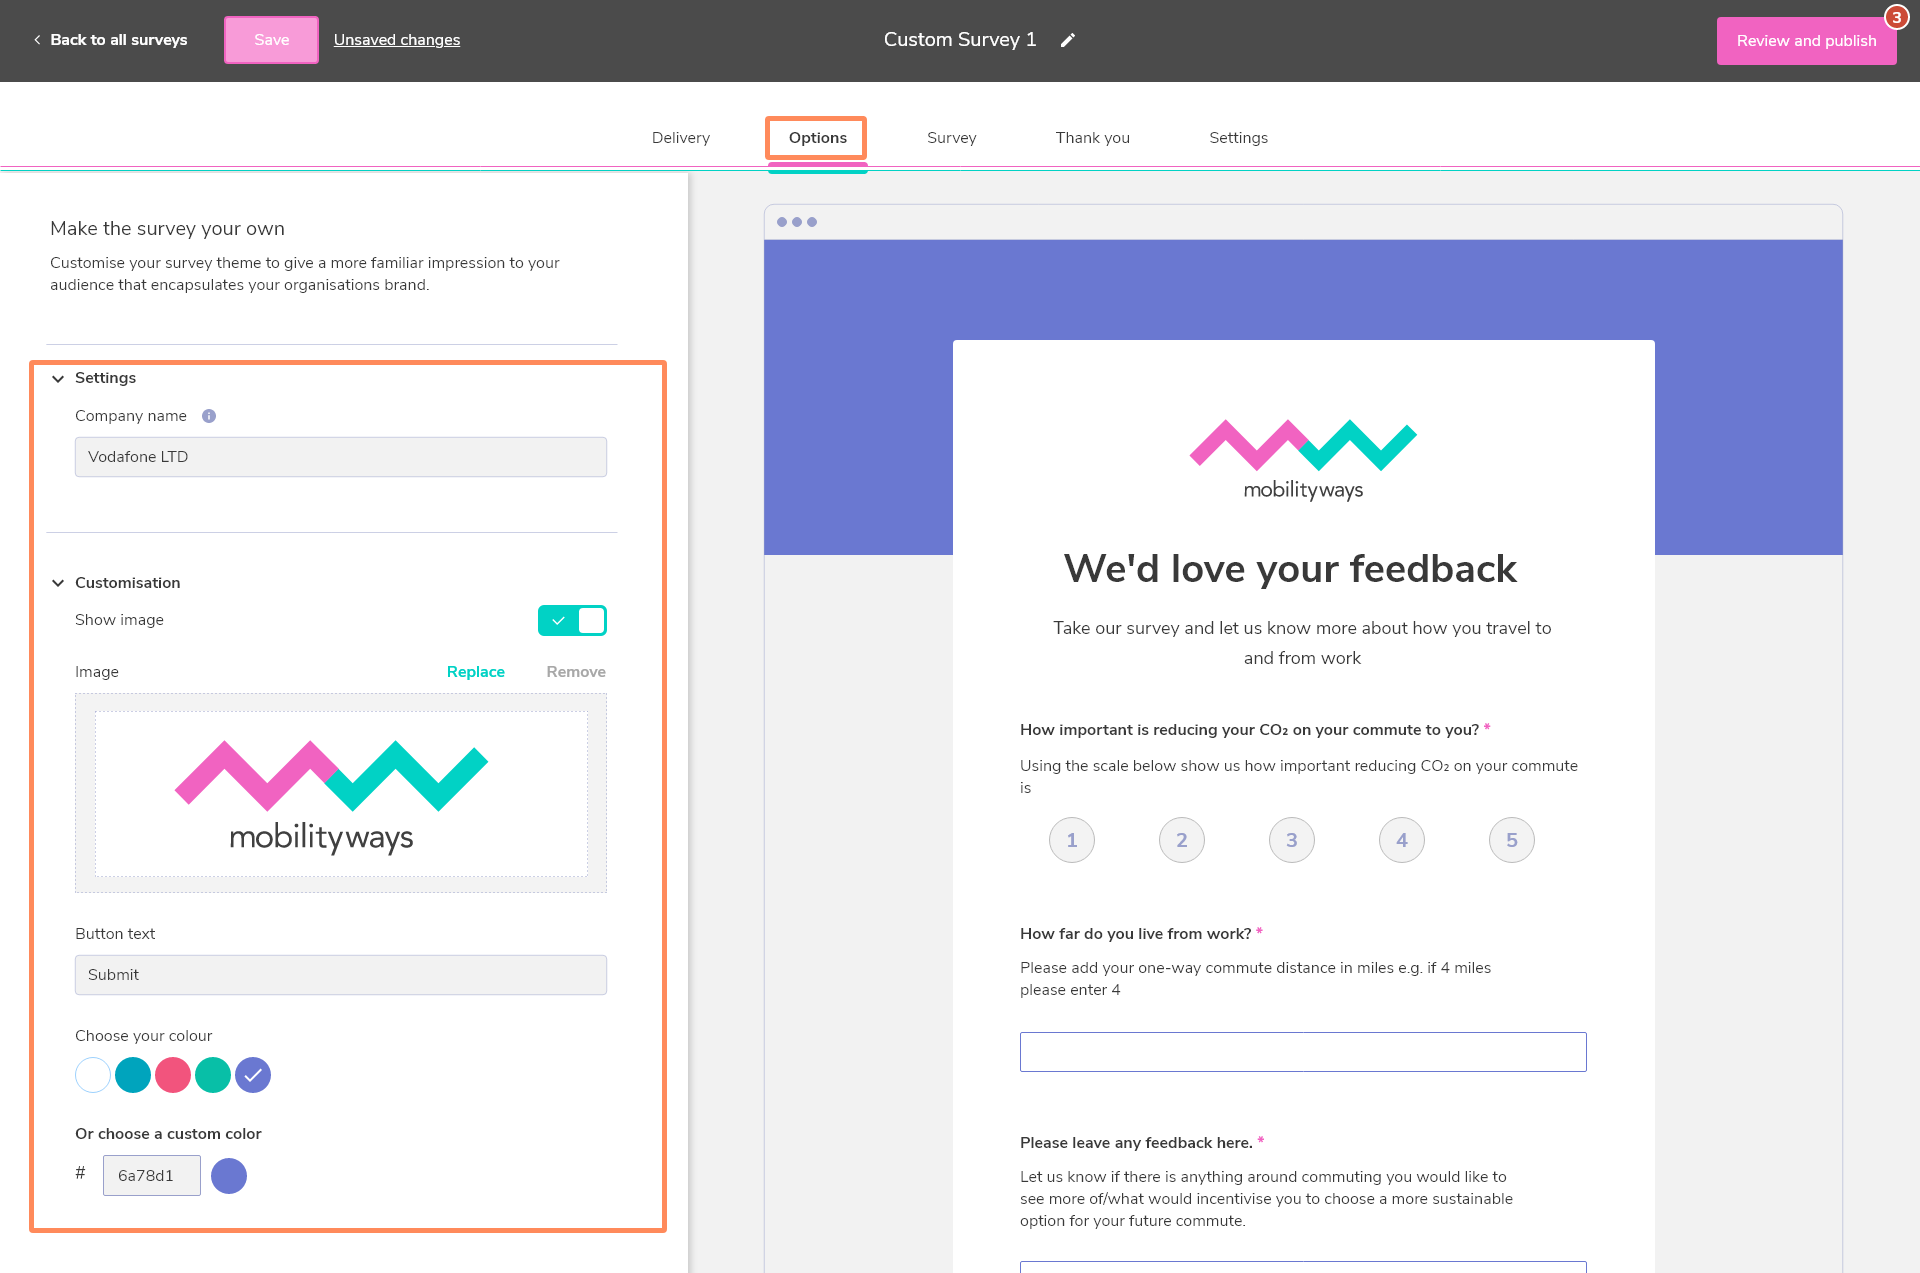
If you have selected Sharable link as your preferred delivery method then the Options tab allows you to customize your survey theme.
- Complete your survey settings
- Enter your organization's name in the Company name field, your company name will display at the bottom of your survey and let respondents know the survey is from.
- Complete your survey customizations options
- Upload an optional header image
- Select the colour theme for your survey
c. The email tab
If you have selected email as your preferred delivery method then the Email tab allows you to customize your email settings, email theme, and survey theme
- Complete your email settings;
- Enter your organization's name in the Company name field, your company name will display at the bottom of your survey and let respondents know the survey is from.
- Enter in a clear descriptive subject line for your email
- Enter in a greeting for your survey email.
- Enter in an introduction for your survey email.
- Customize the button text which will allow recipients to launch the survey in their browser
- Complete your email and survey customization options;
- Upload an optional header image for your email and survey
- Select the colour theme for your email and survey
d. The survey tab
Create or customize your survey using the below survey from the survey tab to truly make your survey your own.
- Enter a survey title
- Enter a survey introduction
- Start Building your survey by editing any existing questions from your survey template or add new questions
- To edit existing survey questions, hover over the survey question you would like to edit in the left side menu and click the pencil icon. This will open the editing menu, once you have edited your question, click Add question to survey.
- To create a new survey question, click Add a question +, select your question type. This will open the editing menu, once you have edited your question, click Add question to survey.
e. The thank you tab
Show your appreciation and let respondents know that you value their feedback. If you are incentivizing the survey with a prize draw, you can tell your audience how you will contact the winner(s) here.
- Upload an optional header image for your survey thank you message
- Enter in a thank you message title
- Enter your thank your message text
f. The Recipients tab
If you have opted for email delivery of your survey, then the recipient's tab allows you to select whom you would like to send your survey. You can choose to select recipients by name or send your survey to or select recipients based on criteria such as postcode, previous travel mode, or any other contact attributes.
-
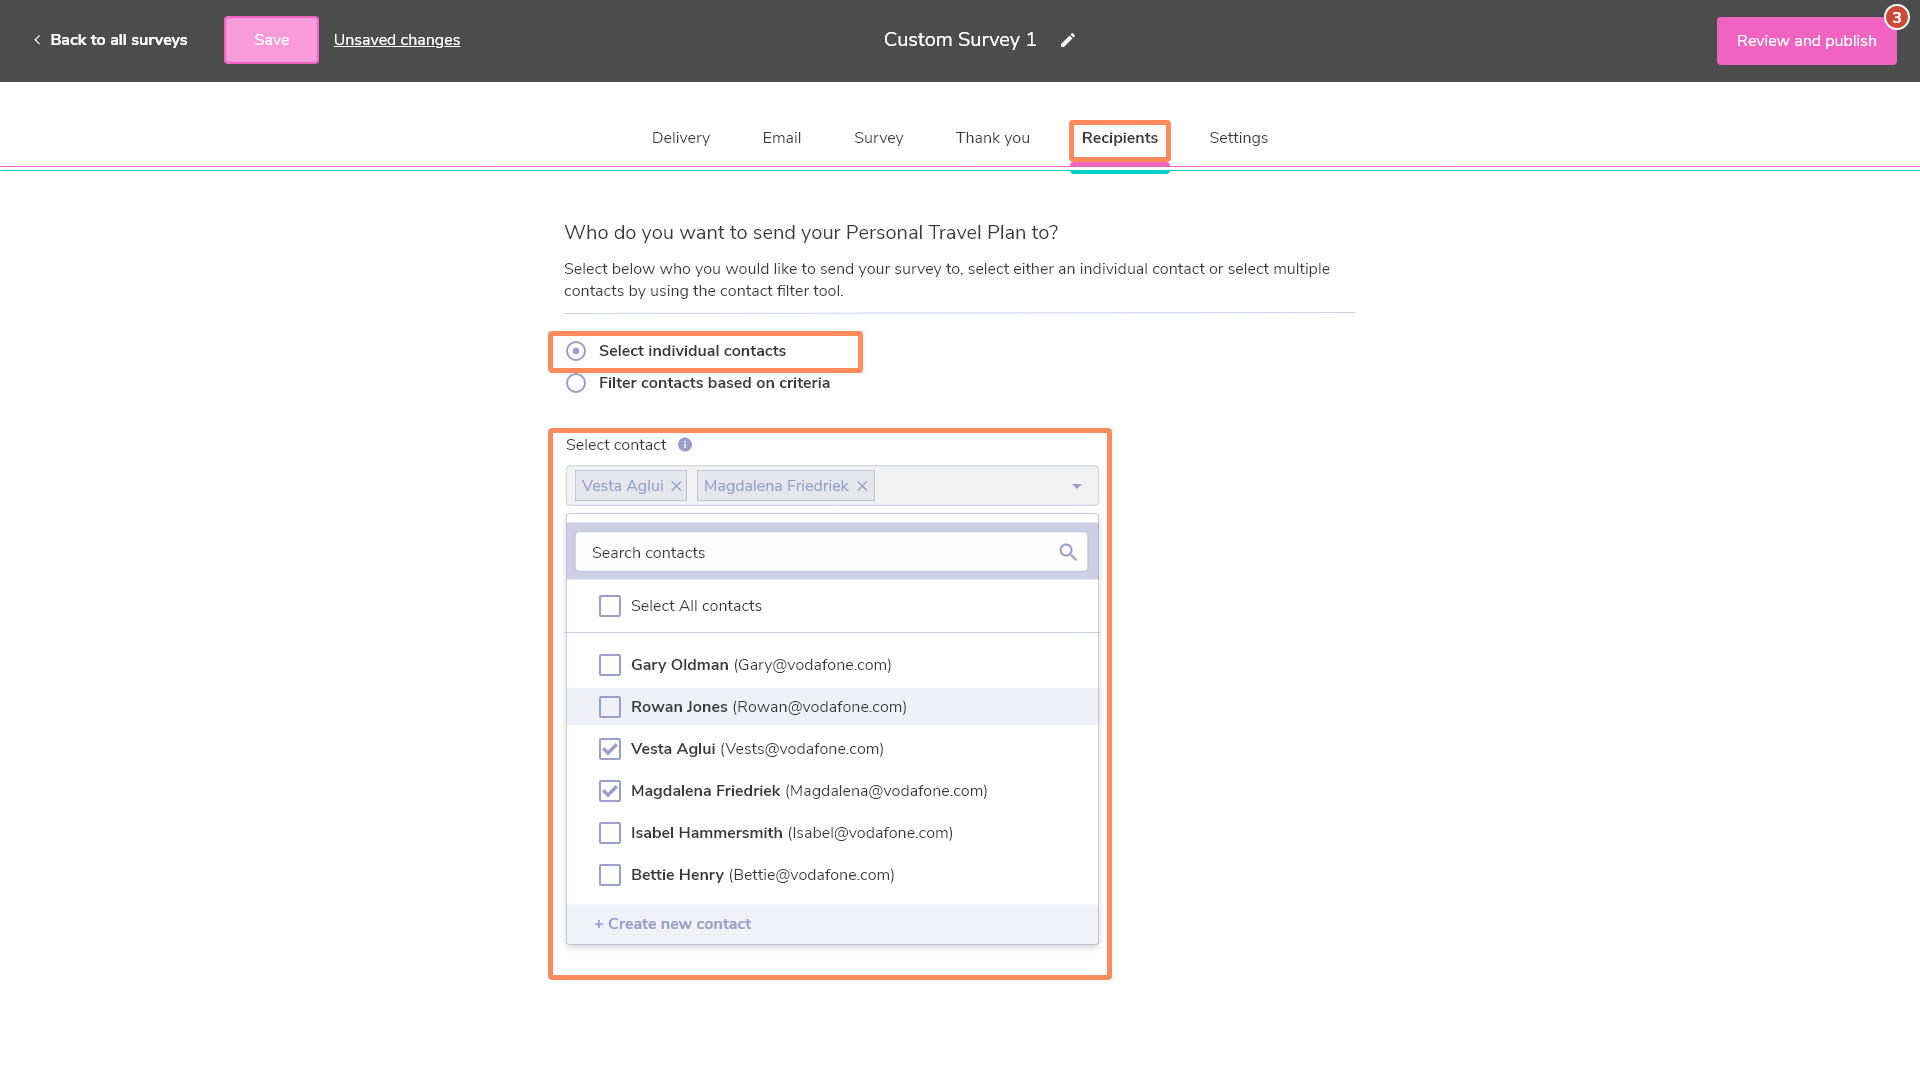
Selecting individual or all contacts - If you know which contacts you would like to select as recipients, then simply opt to select individual contacts. Once the select contact dropdown appears, you can search and select individual contacts from the dropdown, or select all to select all contacts in your contact list.
-
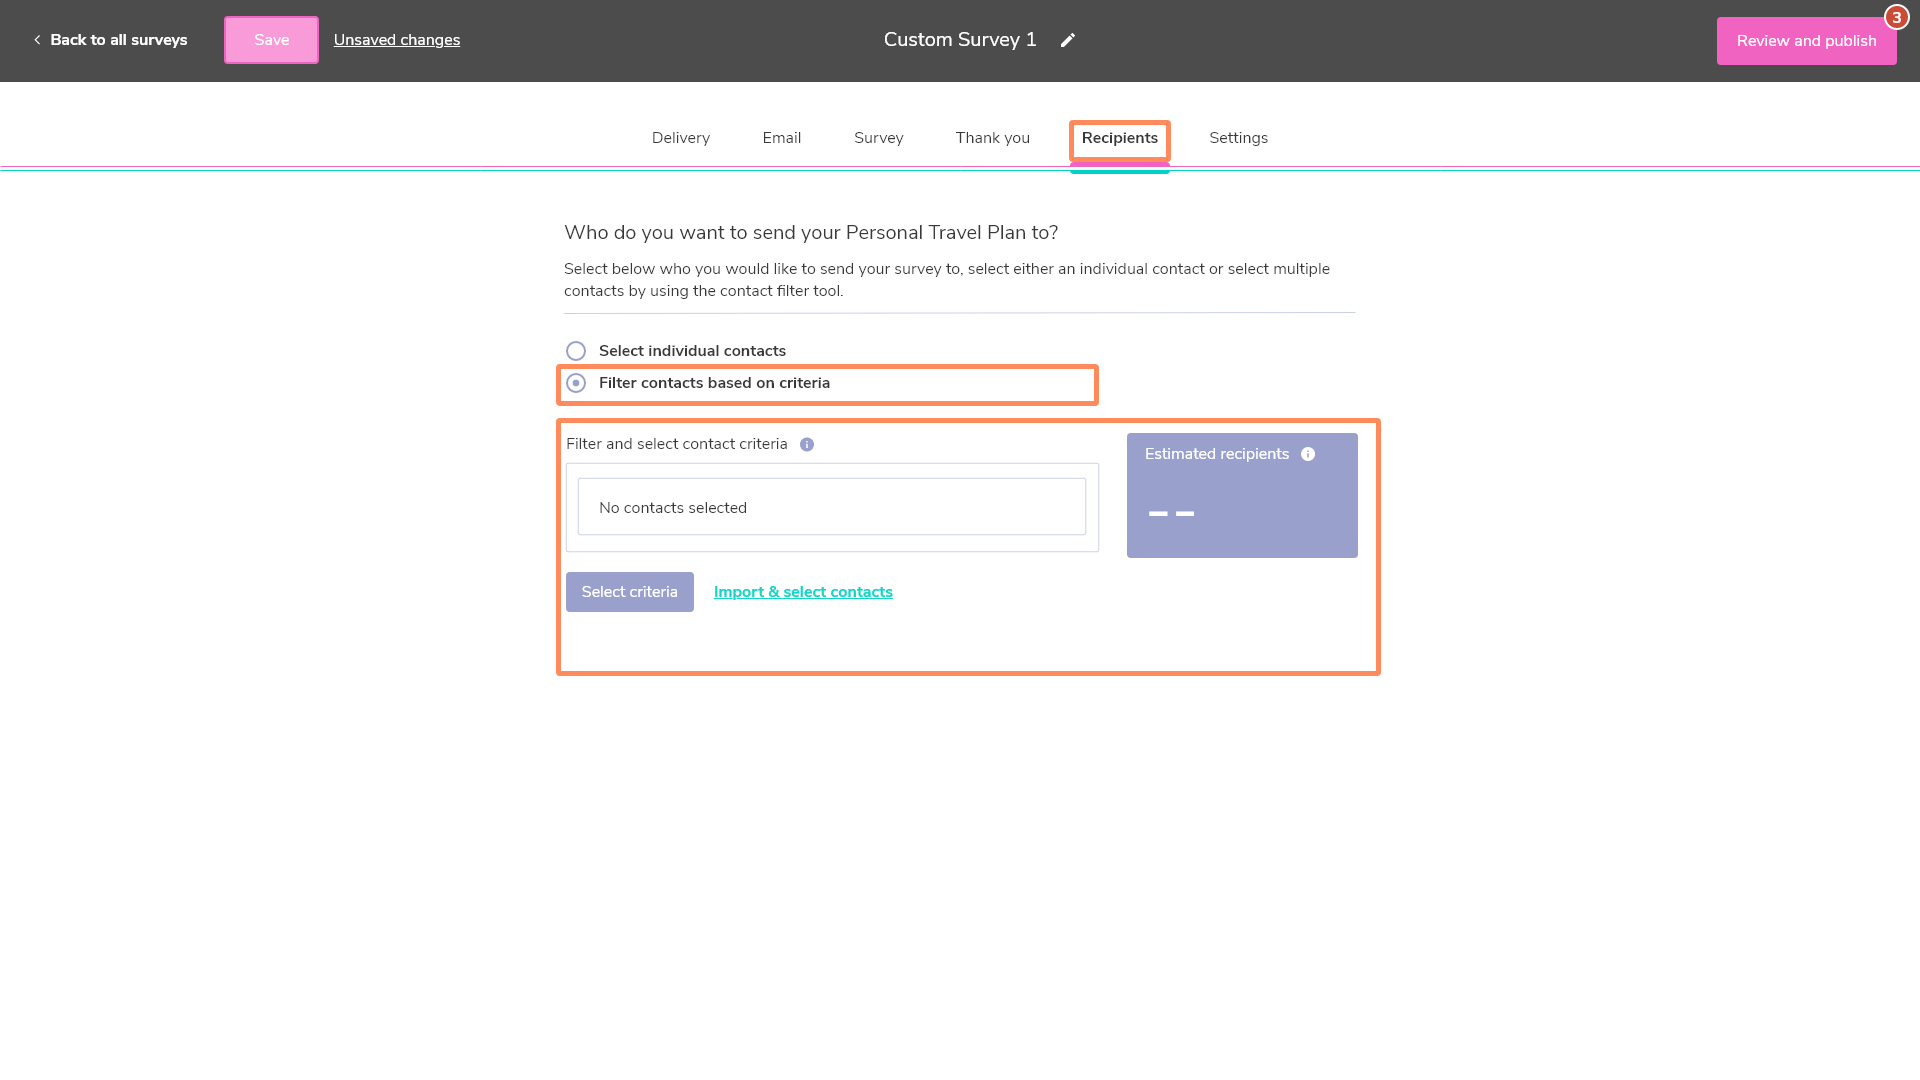
Filtering contacts based on contact criteria - If you would like to select contacts based on criteria or contact attributes then select filter contacts based on criteria. Here you will be able to select recipients based on their previous travel modes, their commute distance, and much more.
-
Click Select criteria, this will open the filter tool.
-
Select a contact field from the left side menu which will be used to filter your contacts
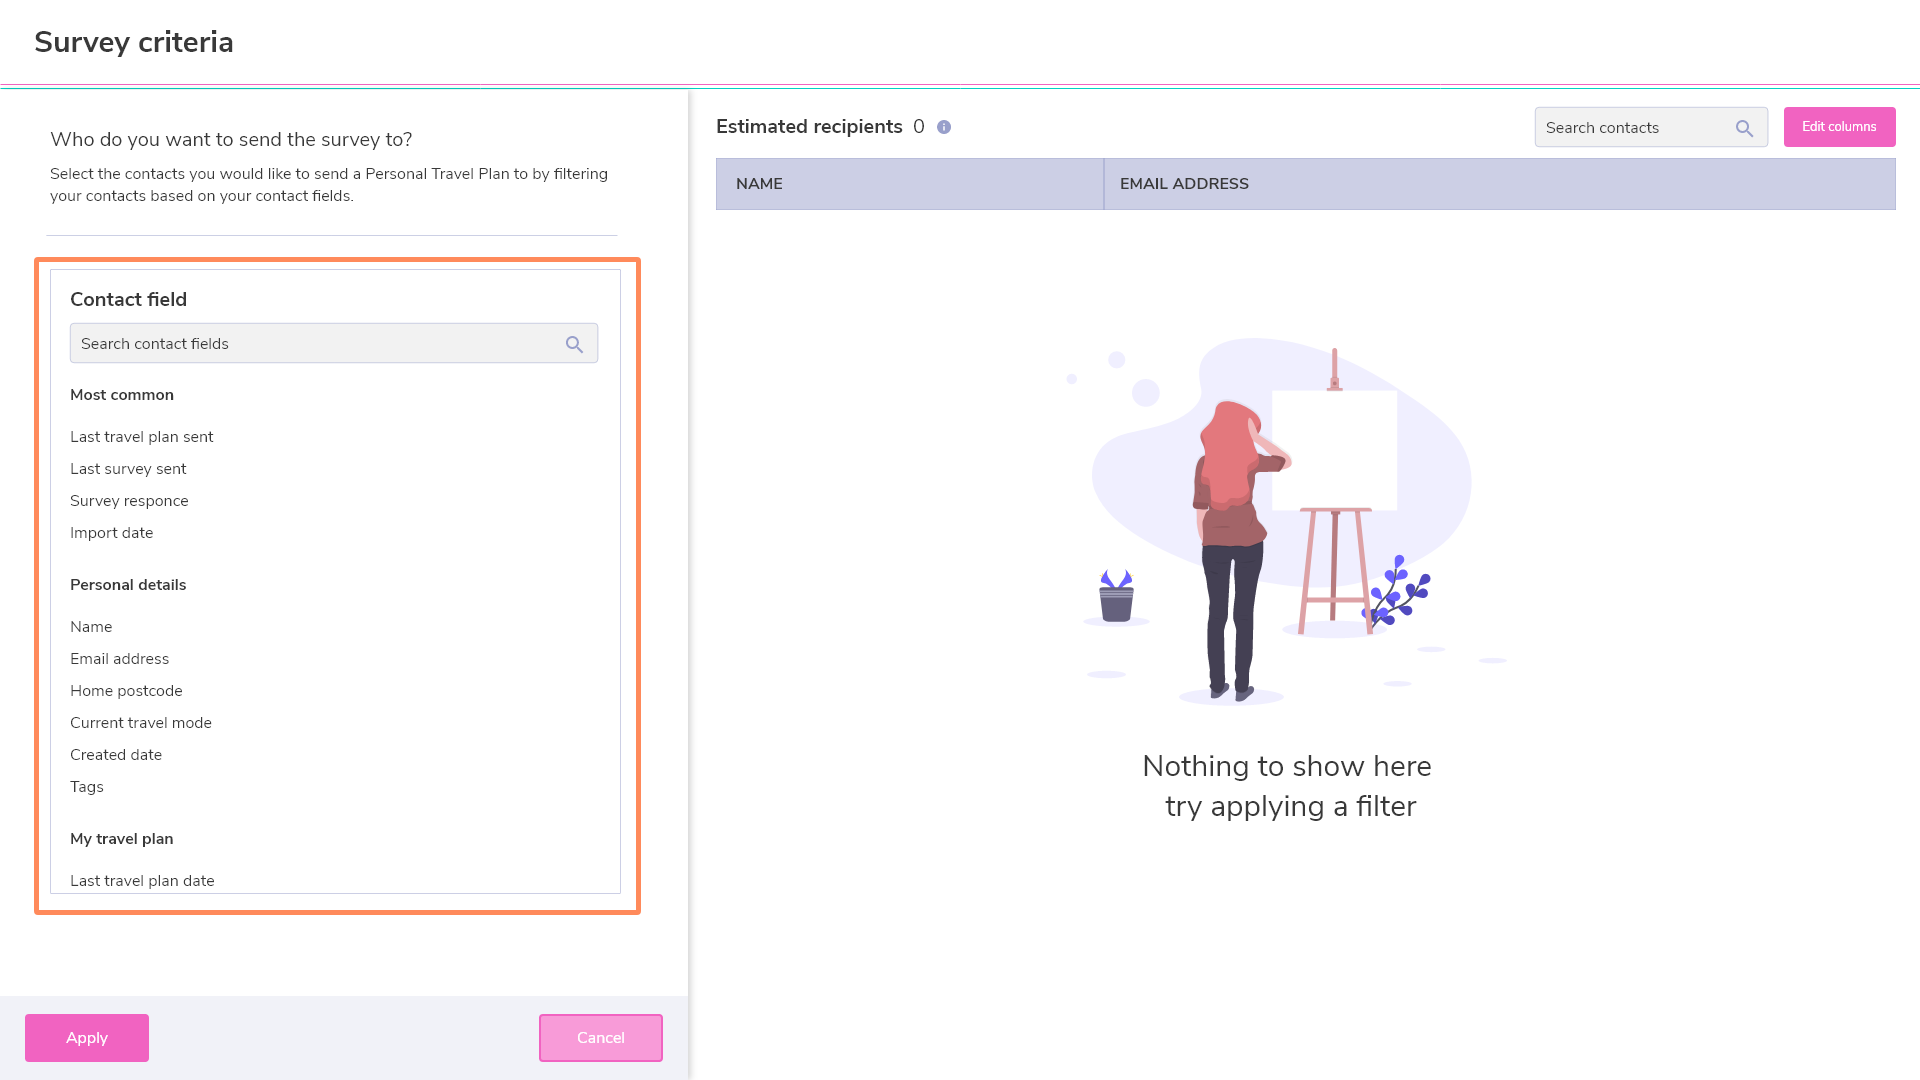
-
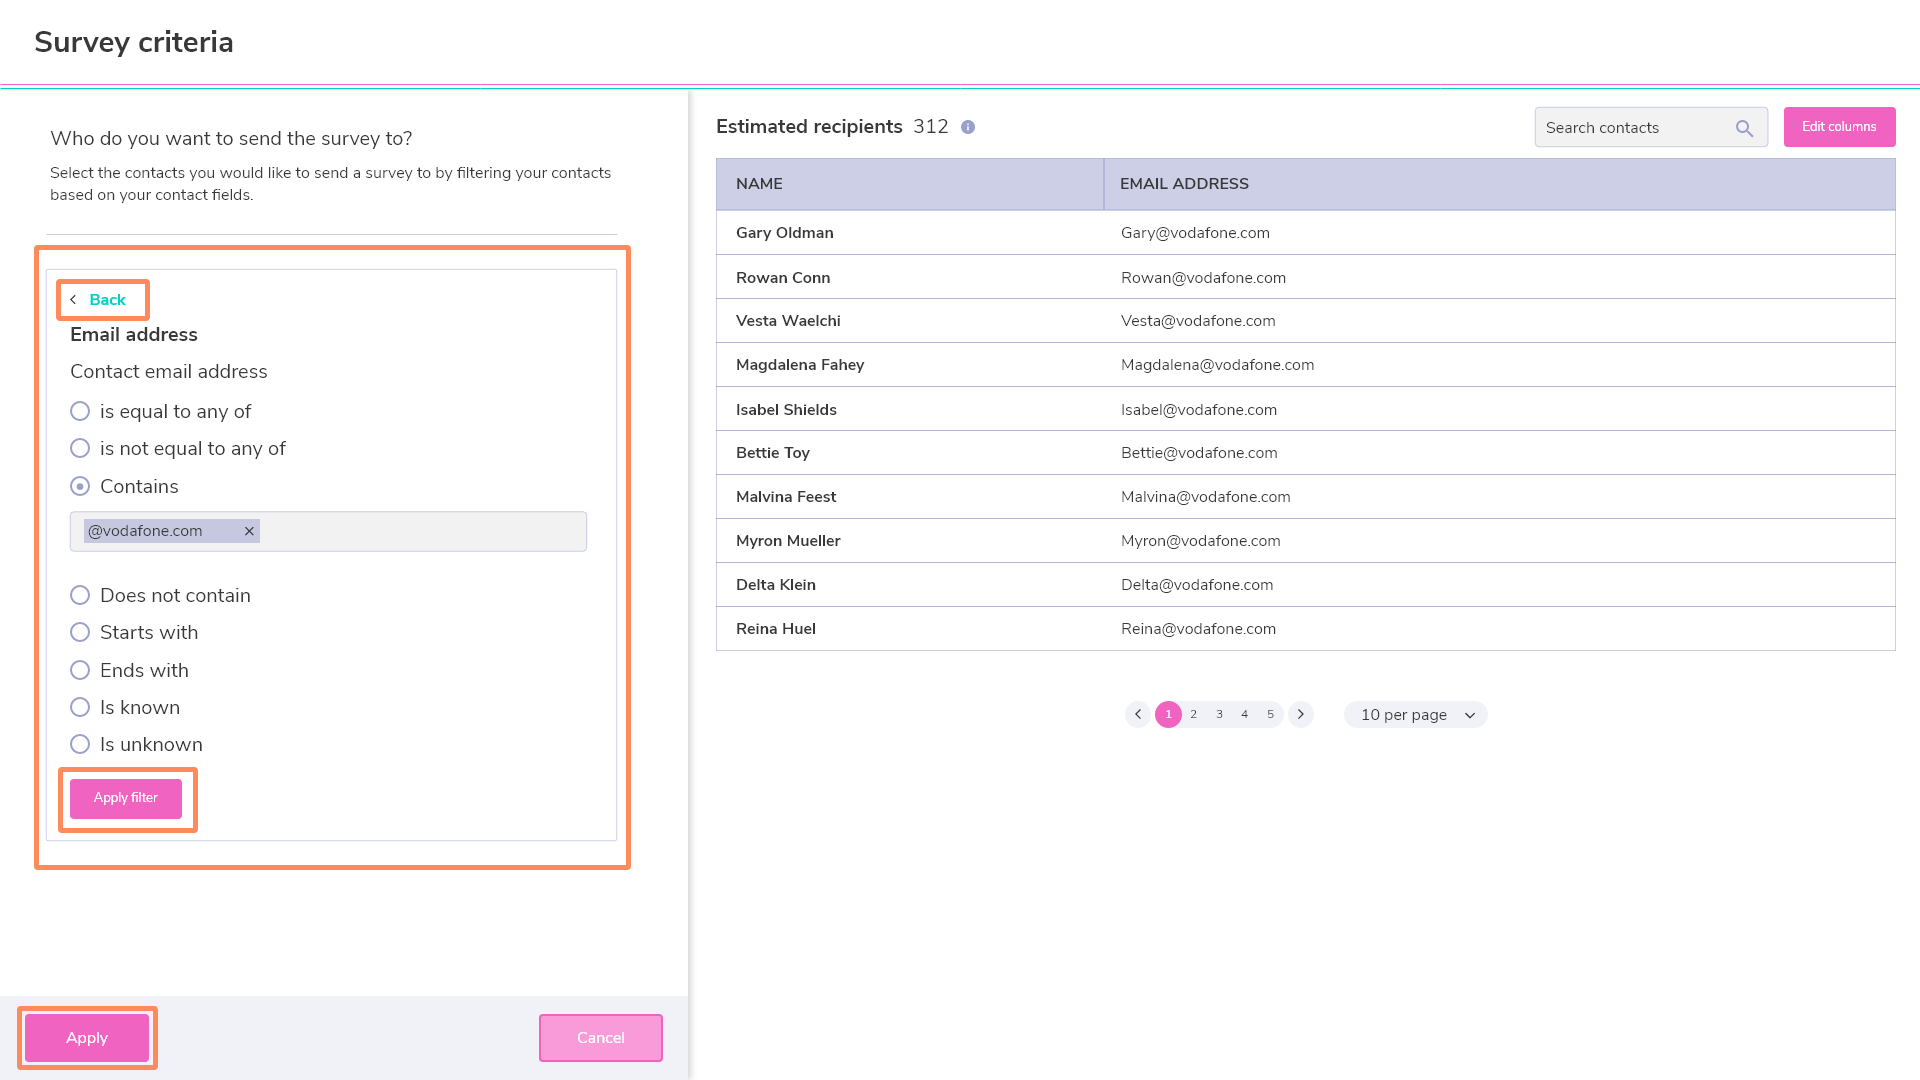
Select the options best suited to how you want to filter your contacts, then click apply. You will then see a list of contacts appear in real-time on the display panel on the right.
-
Once you are happy with your selection, click back to apply another contact filter or click Apply at the bottom of the screen to exit the filter menu.
-
f. The review and publish modal
Once you have completed all the tabs of the survey wizard and you are happy with your survey, its time to review and publish your survey, click the Review and publish button at the top right of the survey wizard
- If there is any errors with your survey then these will be displayed at the top of the Review and publish modal in a section called errors to be fixed. These errors need to be fixed before you will be able to publish your survey. Click onto each error in this list to be taken to its corresponding tab within the survey wizard.
- If you have selected the email delivery mode for your survey, you can choose to send a test email to yourself or another Mobilityways user.
- Select send a test survey
- Select a recipient for your test survey from the list of other mobility ways users on your account.
- Select a contact to test any personalization options that may exist on your email or survey.
- Once done click sent test survey
- Click View in browser to preview what your survey will look like to respondents in your browser, this will open your survey up in a new window.
- Once you are ready to publish your survey, click the publish button at the bottom right-hand side of the Review and publish modal.
3. Reviewing your survey results
By clicking on a published or unpublished survey from your survey list you can view and analyze your survey results and understand more about the performance of your survey. The survey analytics tool is separated into 3 sections:
From here you can analyze and view your survey feedback in an aggregated or individual views and monitor the conversion rate and email performance of your survey
-
- Survey analytics - review your survey results, conversion rates summary, and how response rate over time.
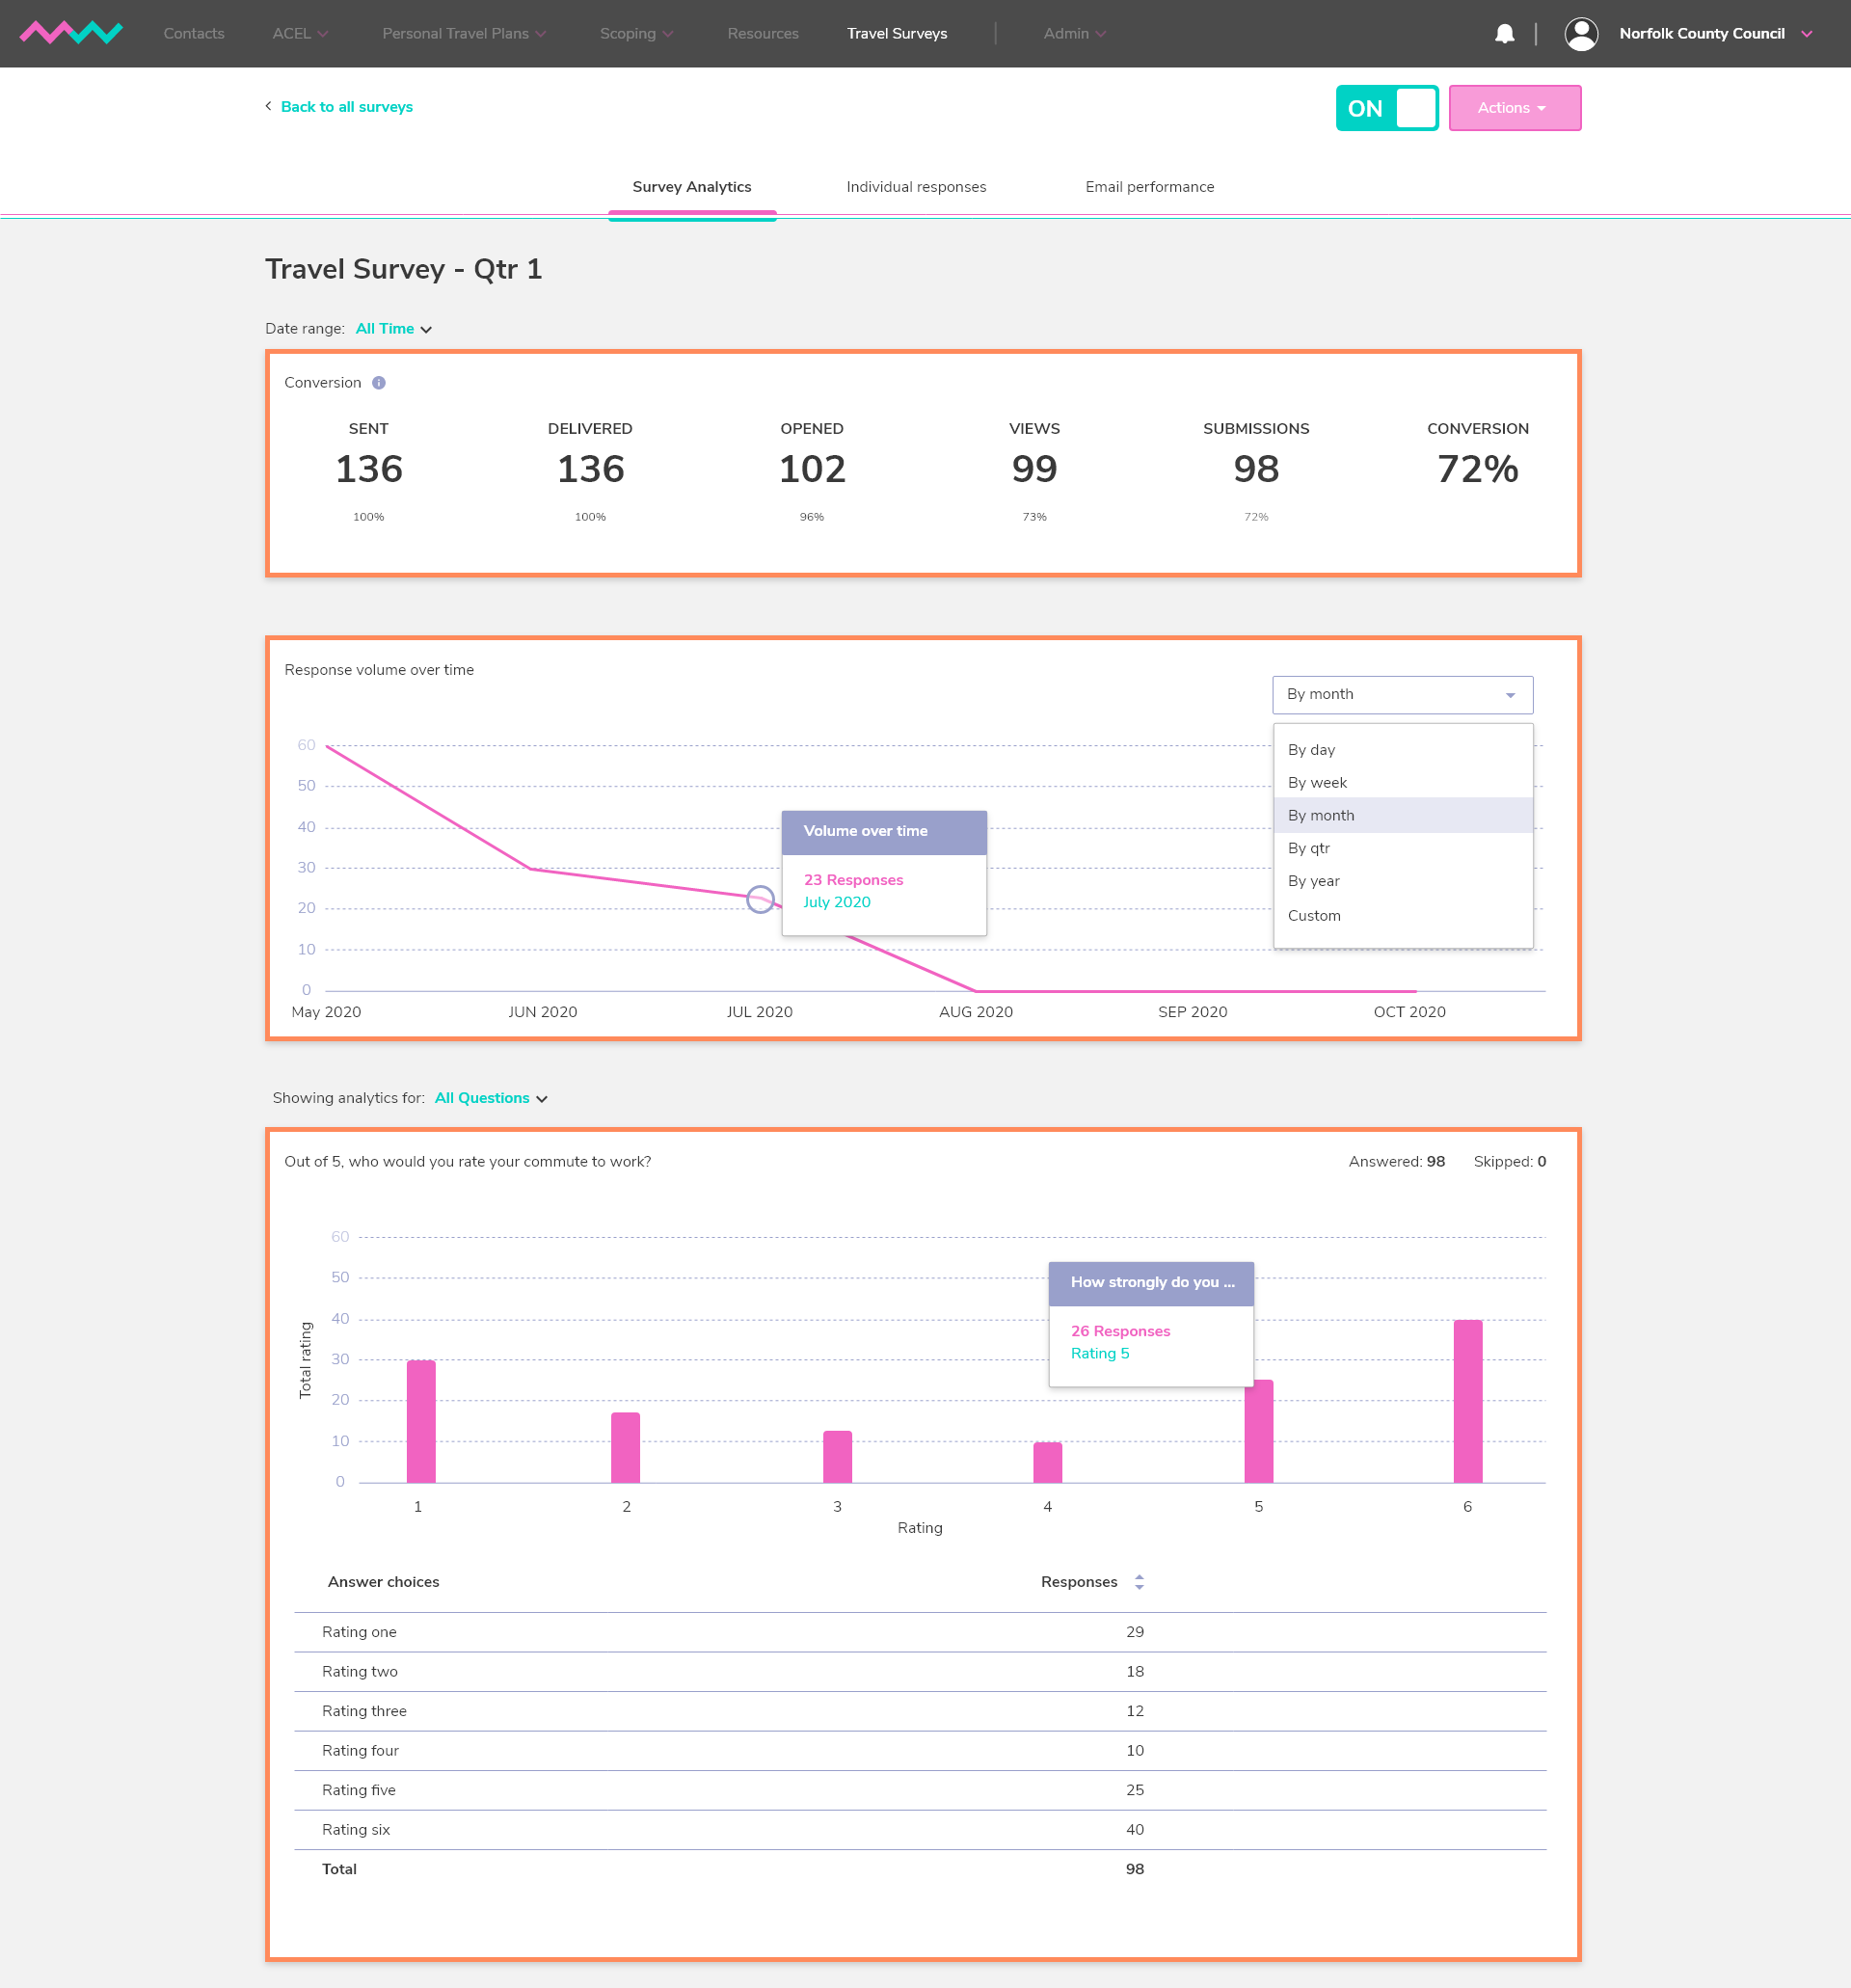
- Survey analytics - review your survey results, conversion rates summary, and how response rate over time.
-
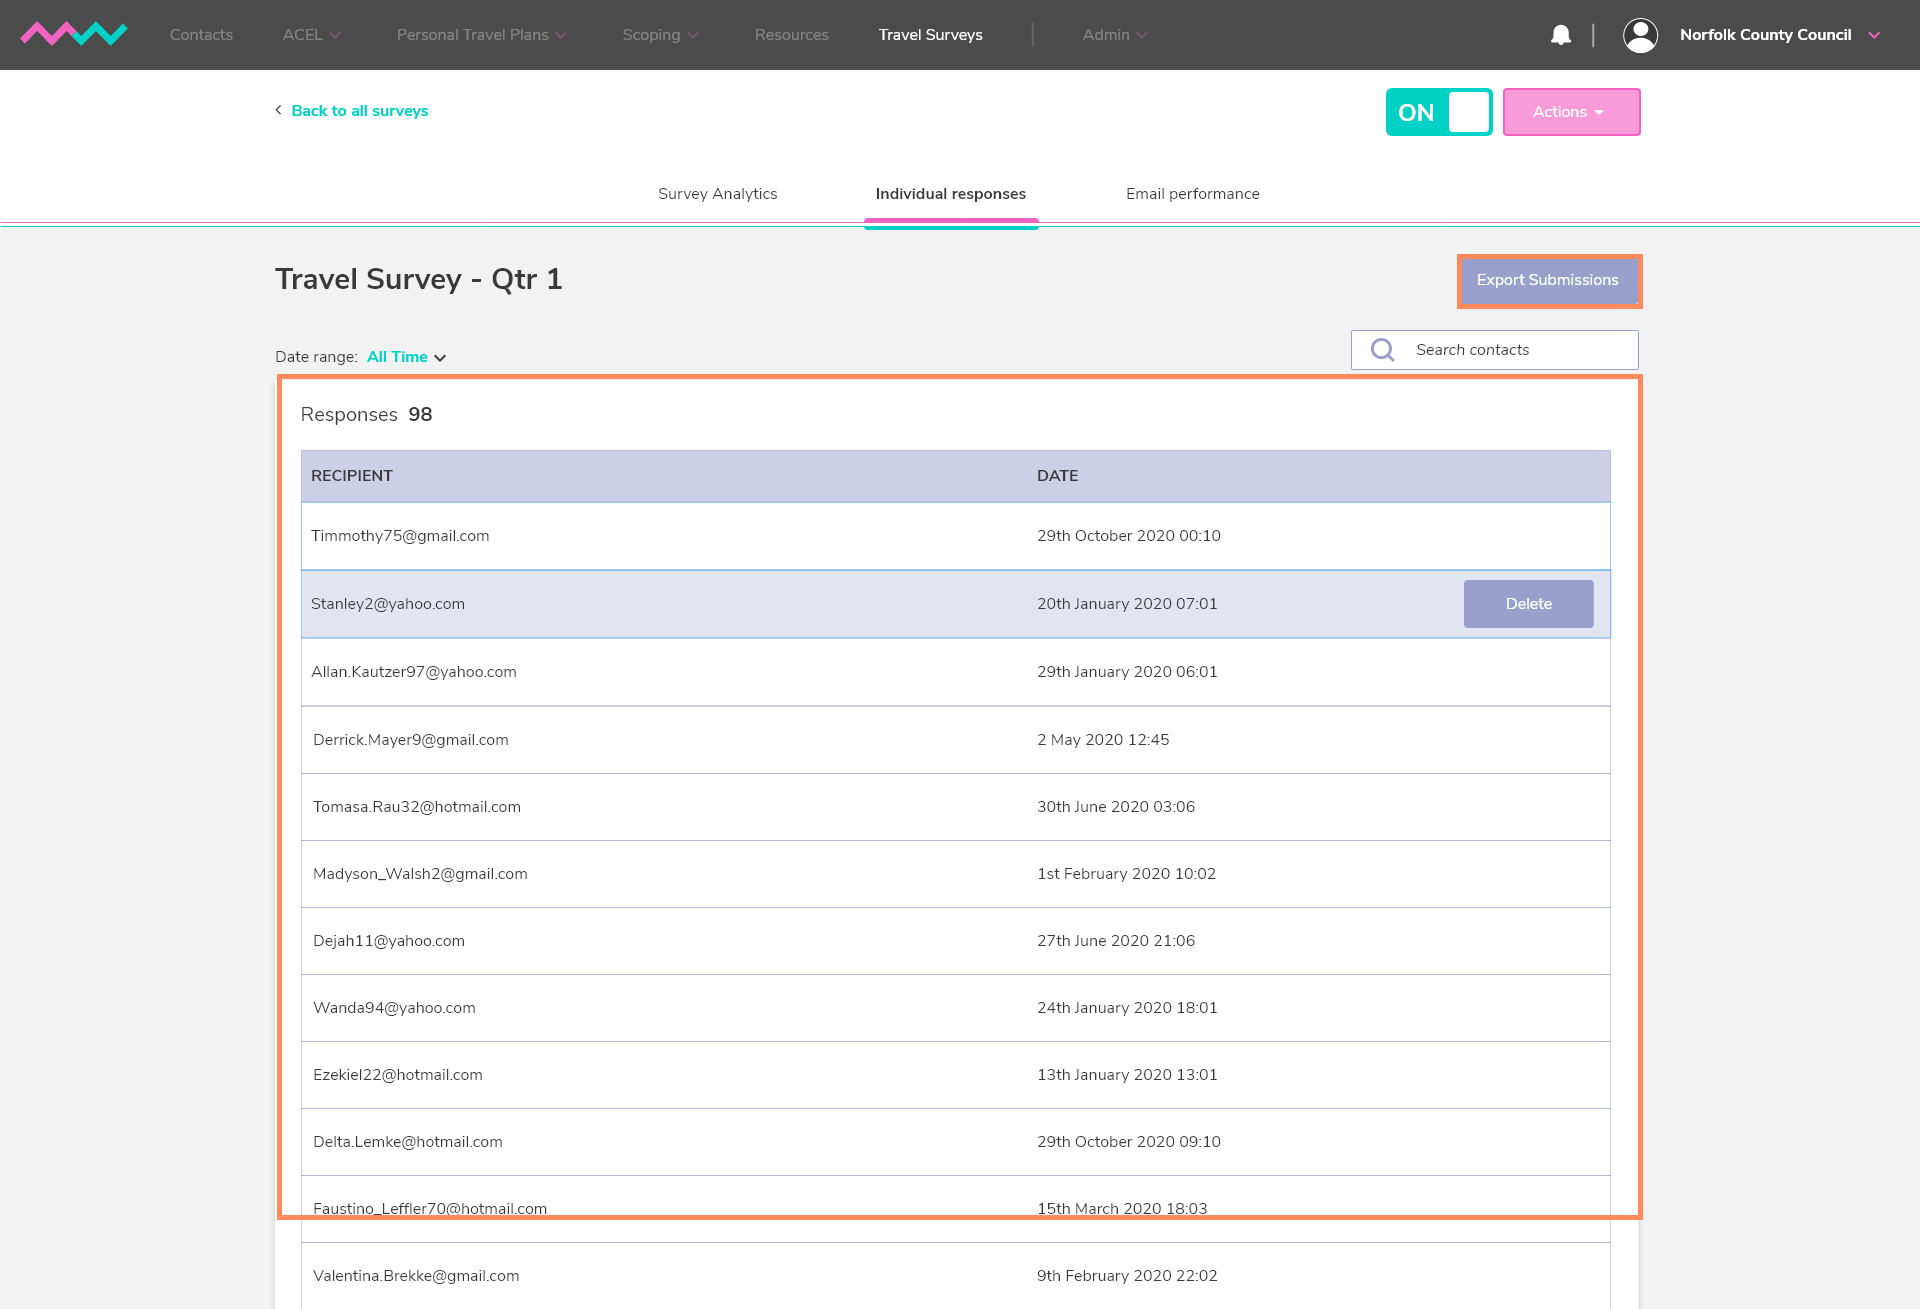
- Individual responses - review individual responses to your survey as well as exporting your survey data.
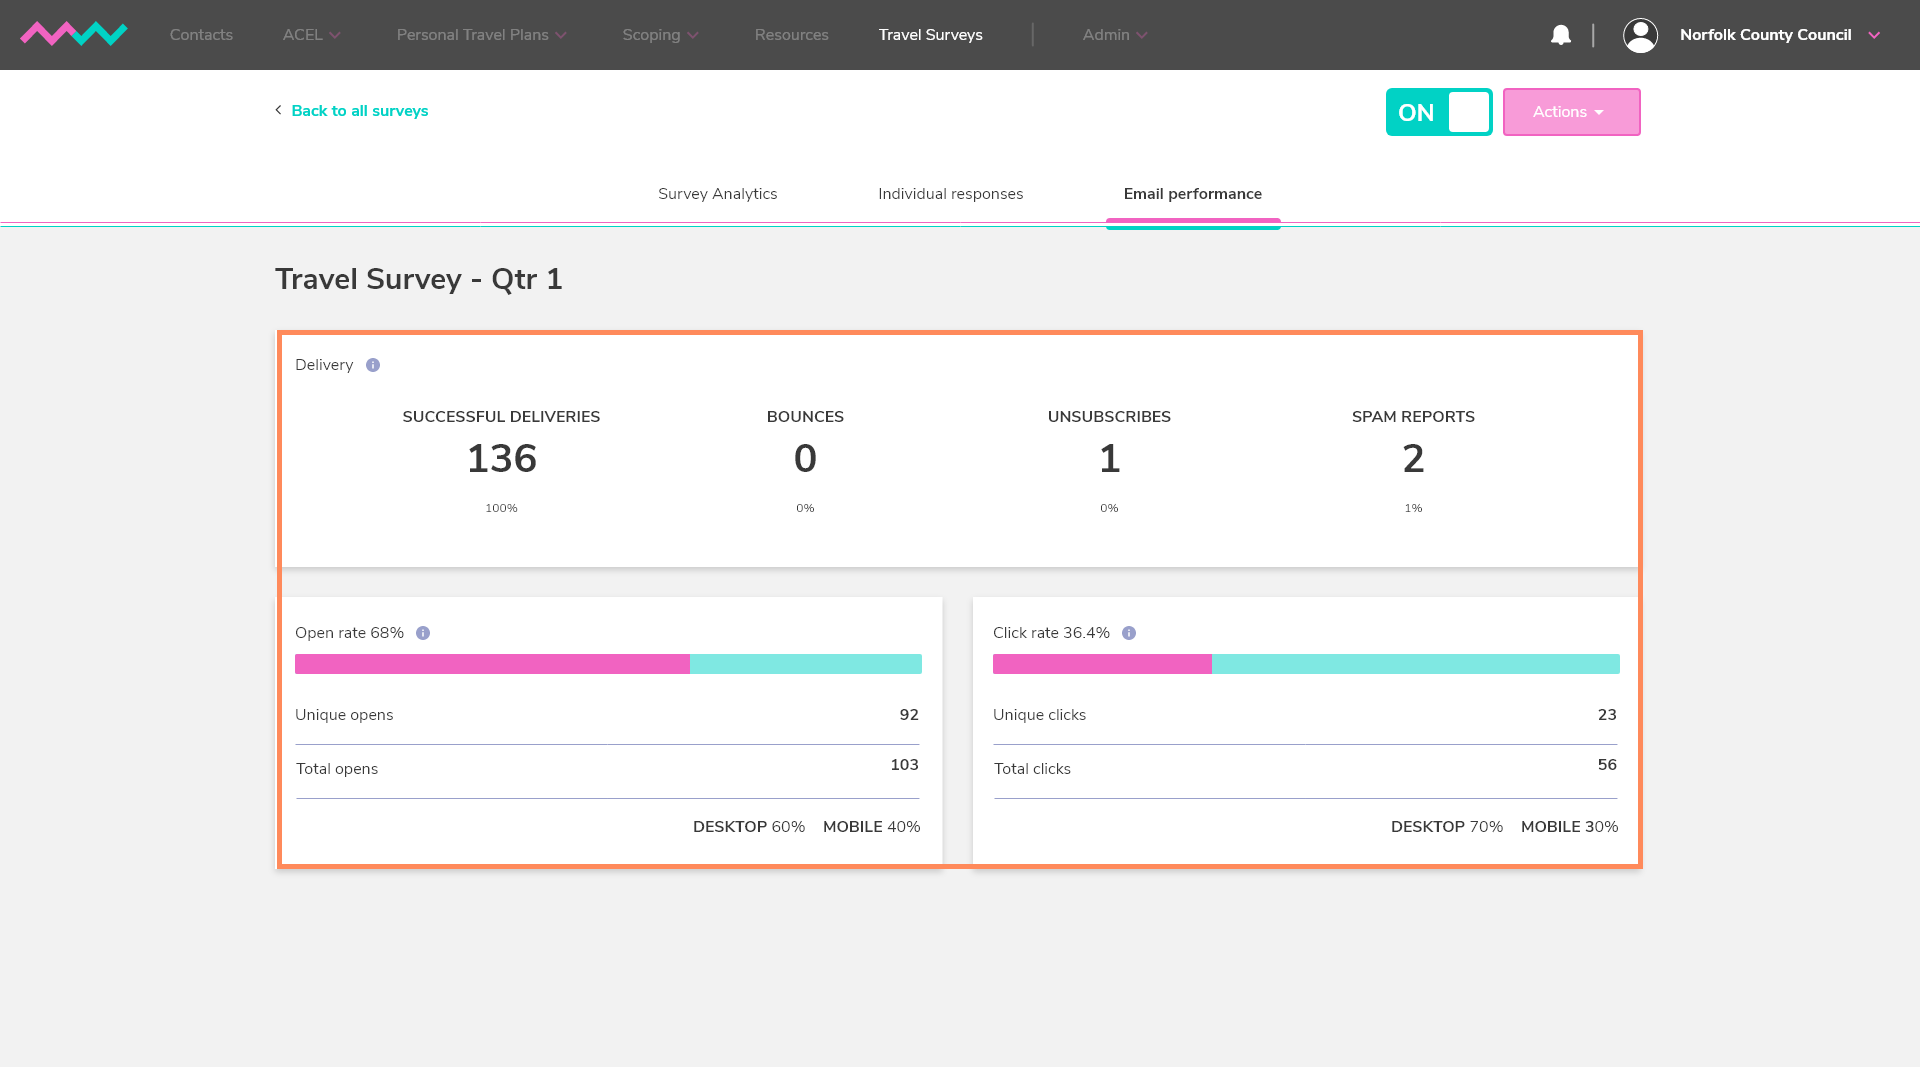
- Email performance - For email surveys review the performance of your survey email by tracking open and click rate to measure engagement levels.
- Individual responses - review individual responses to your survey as well as exporting your survey data.
