PTP user guide
A Guide to creating and sending Personal Travel Plans (PTP) to your workforce.
Contents
- Recipients
- Contact tags
- Emails
- Travel plan email
- Behaviour change survey email
- Follow-up survey email
- PTP dashbaord
- Survey results
- Widget
- PTP tab
- Settings tab
- Review and finish
Recipients
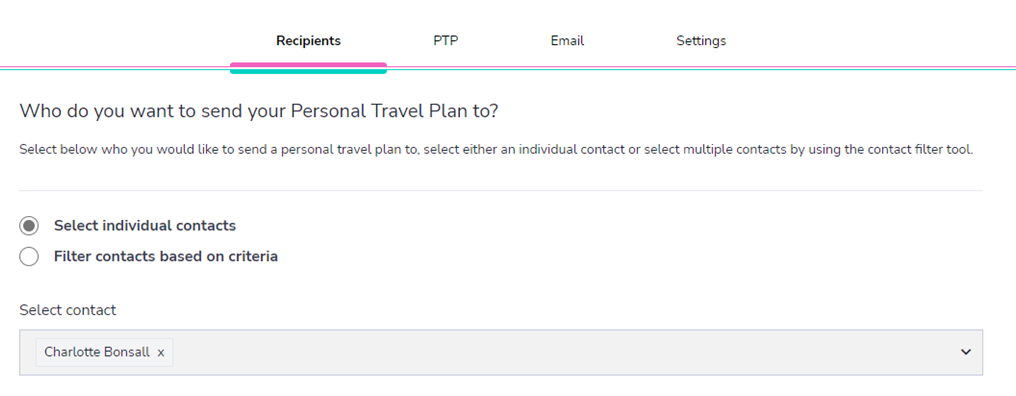
Send an individual personal travel plan to staff members from the existing contact list (If you’re not sure how to add to your contact list click here)
OR
Send a batch of personal travel plans to staff either by selecting multiple staff members from the inbuild contacts list or upload an Excel CSV. File containing the staff members data (full name, email address, postcode and shift pattern*.)
*If you have it.

Contact tags
You can also send PTPs based on set criteria, such as department, or shift times:
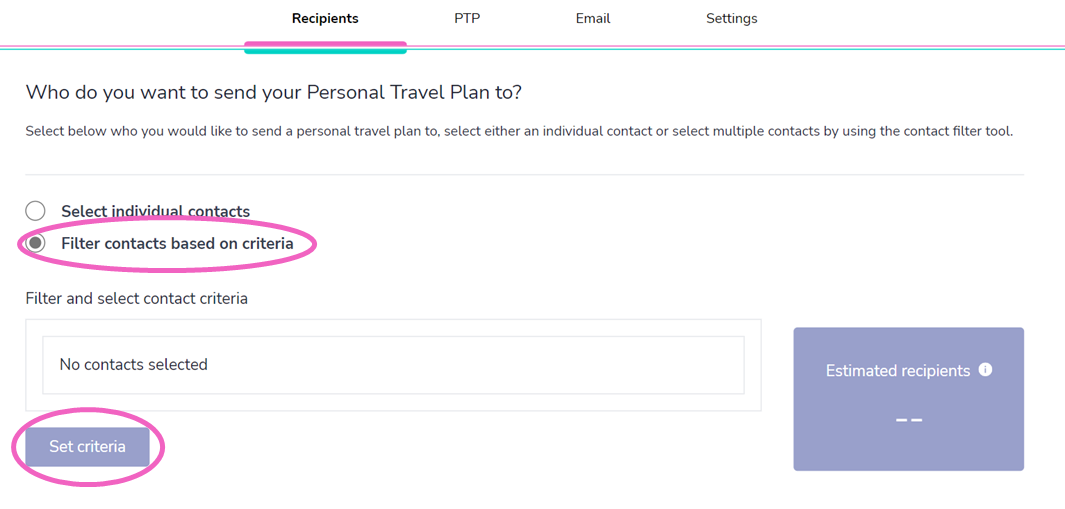
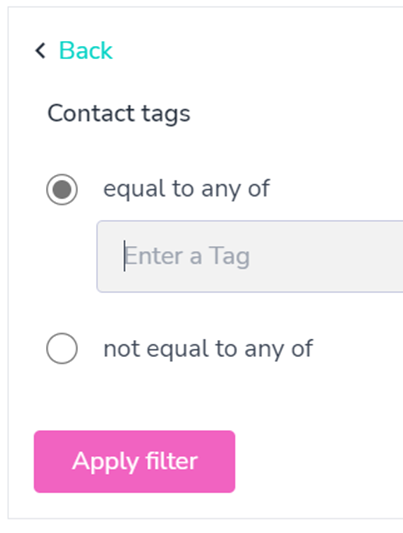
Once you have clicked 'set criteria' you will then have to 'enter a tag'.
Emails
If you decide to send out PTPs via email, you need to create the email content that your staff will receive.
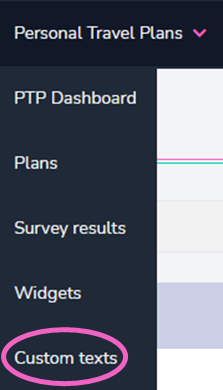
In the Personalised Travel Plans module tab there is a drop down option named ‘Custom texts’
Here you will be able to see 3 example texts that we have created to give you examples.
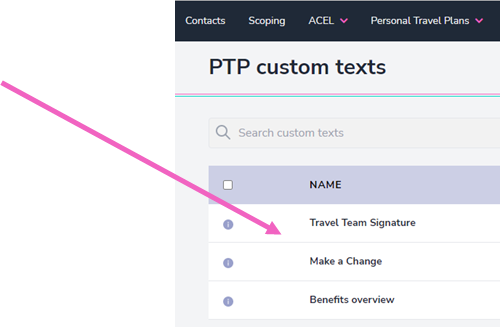
You can create your own custom text which can then be included within the PTP email send out.
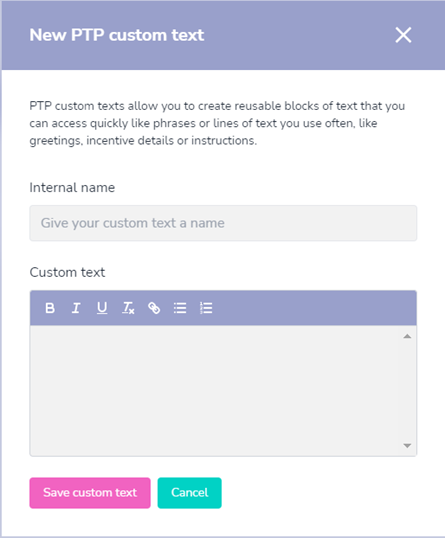
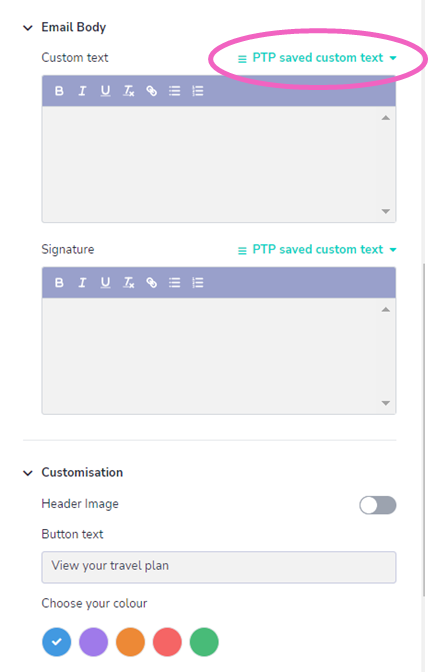
This is where you should include all the information about any incentives or relevant travel links. Make sure that any links you include are live (i.e practice clicking them and make sure they take you to the right place). Additionally, do not include any links to documents, as our system will not be able to process them - they need to be live intranet links.
Use our examples as a guide but make sure to create your own, so that the content is relevant to your organisation and your staff.
As part of the PTP module your staff will receive 3 emails
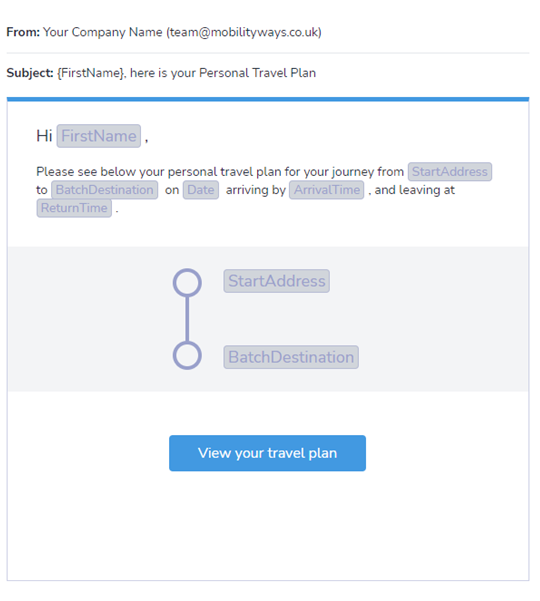
- the first includes the link to their PTP
- the second is the behaviour change survey email
- the third is the follow-up survey email

Make sure to click through (top left hand side of screen) and customise each email.
Travel Plan Email
Behaviour Change Survey Email
To collect data on behaviour change, emails with a survey link are sent out 2 weeks after your contacts have received their travel plan. This will enable you to see whether travel plans have assisted in encouraging recipients to change their commuting behaviour for the better.
Follow-up survey email
Lastly, to collect data on behaviour change, specifically on whether recipients have made a long-term change to their commuting behaviour, these follow up surveys are sent out 3 months after the recipients have been sent and responded to the first behaviour change survey.
PTP dashboard
You can view live analytics within the PTP behaviour change dashboard.
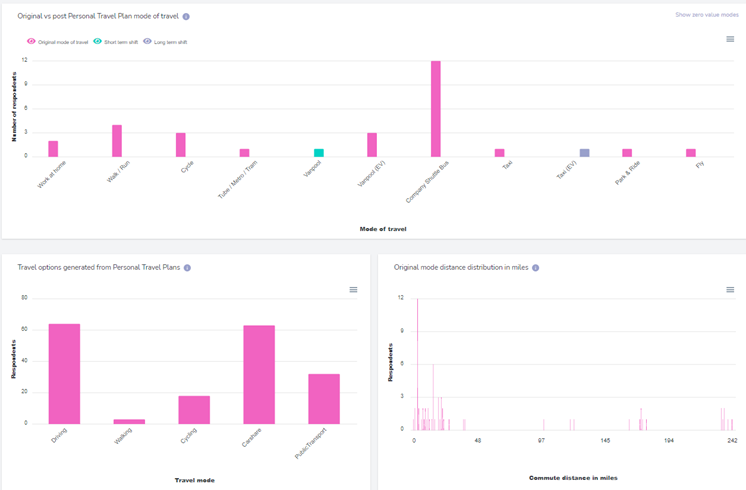
This page gives insight into what impact the travel plans have had on the commuting behaviour of your organisation.
Survey results
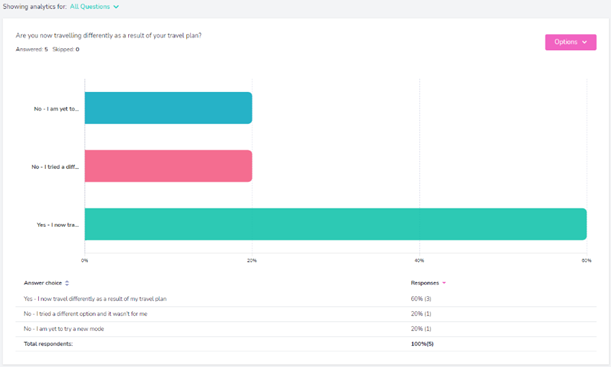
To get a more in depth look at the responses to each question click to view survey results in the drop-down list. From here you can see the breakdown of responses summarised in visual graphs including percentages and response rate.
Widget
You can also distribute PTPs is via a plug-in widget. You create the widget within the dashboard and then the code is able to be downloaded and added to your intranet or website. Where individuals can then generate their own PTP.

To create a Widget, go to the PTP tab at the top, and then Widgets. Click Create Widget in the top right corner.
You can choose to create an iFrame, a Button or simply include the link to the PTP page.
iFrame: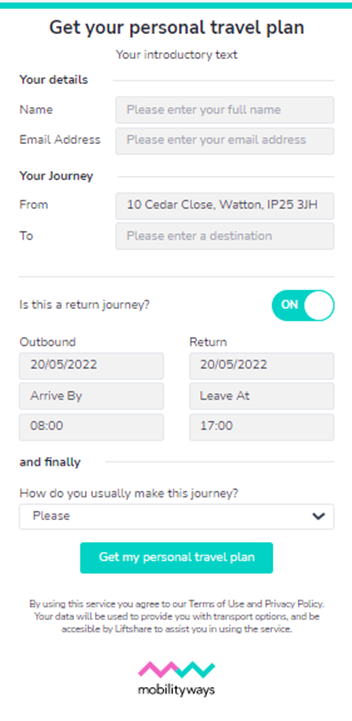
Button: 
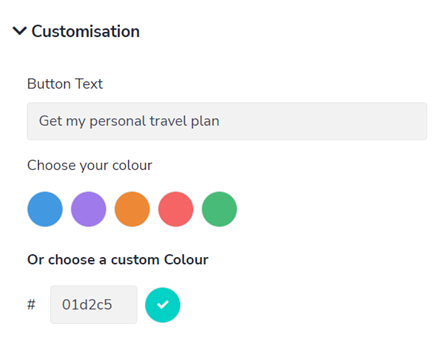
Both the iFrame and button are customisable. Allowing you to use your branding colours.
If you opt for a URL link, once clicked your staff will be directed to a webpage that looks very similar to the PTP tab page. With a box in the left where journey details are inputted and a map on the right.
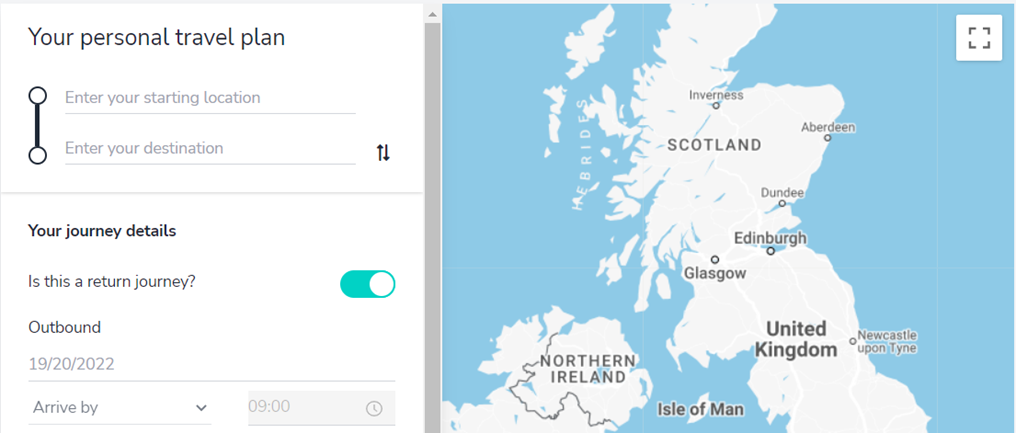
A map should appear along with a box on the left where you need to enter your journey details.
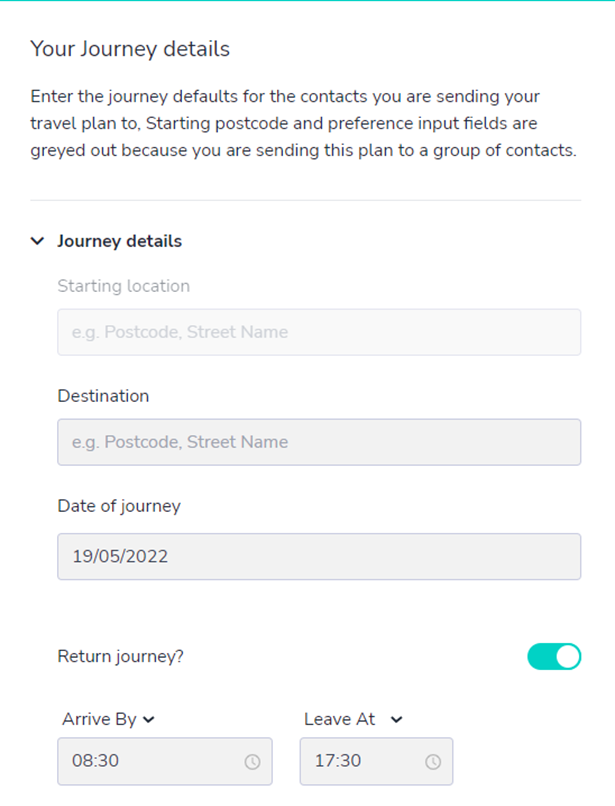
Your starting location is typically the individuals home address. This is why we require the home postcodes – so that the system can automatically input this information in a batch send.
The destination will be your work site location.
When creating your PTP the ‘Date of journey’ will automatically set to the day after. If this is a Saturday or Sunday, this can affect public transport timetables – so just be aware of this and consider changing the date to a week day.
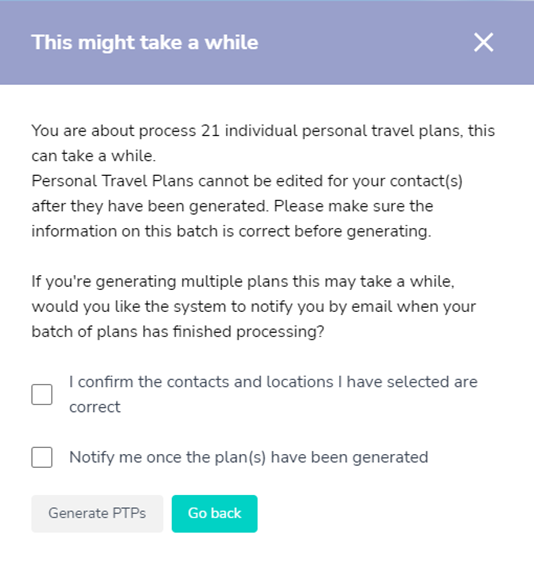
Depending on if you are doing a batch send out, it can take several minutes to generate multiple PTPs. You can leave the page, just make sure not to close it. You can choose to be notified once all the PTPs have been generated.
Settings tab
Once you have generated your batch of PTPs, you can decide when to send out them out in the settings tab. This can either be done immediately or you can schedule a send for later.
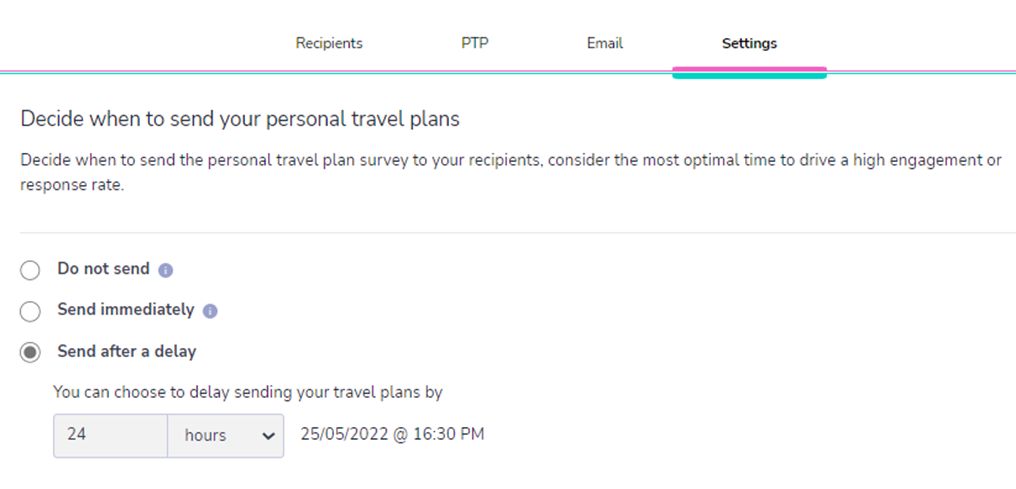
Review and finish
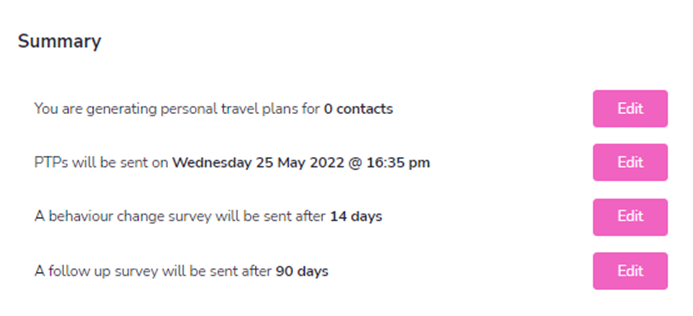

Before you send out a batch of travel plans you can send yourself a test email. This will send you a version of all 3 emails, allowing you to double check that the everything looks as it should.
Once you have checked and are happy,
click finish, to send.
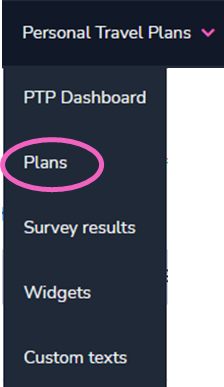
You can view all the plans that have been sent / created in the dropdown tab and ‘Plans’.
![Mobilityways_Primary_Logo_White-1.png]](https://content.mobilityways.com/hs-fs/hubfs/Mobilityways_Primary_Logo_White-1.png?height=50&name=Mobilityways_Primary_Logo_White-1.png)